
The Scroll Box extension in Atomic Addons allows you to create custom scrollable content areas within your Elementor sections and containers without writing any code. It helps improve content organization and user experience by enabling smooth scrolling inside fixed-height layouts, making it easy to display lengthy content in a clean and organized way. With intuitive customization controls and flexible scrollbar styling options, you can seamlessly match the scroll box to your website’s design while ensuring a responsive experience across all devices. In this documentation, we’ll guide you through how to enable, configure, and customize the Scroll Box extension in Atomic Addons.
Enabling the Scroll Box Extension
 (Open the full-size image in a new tab)
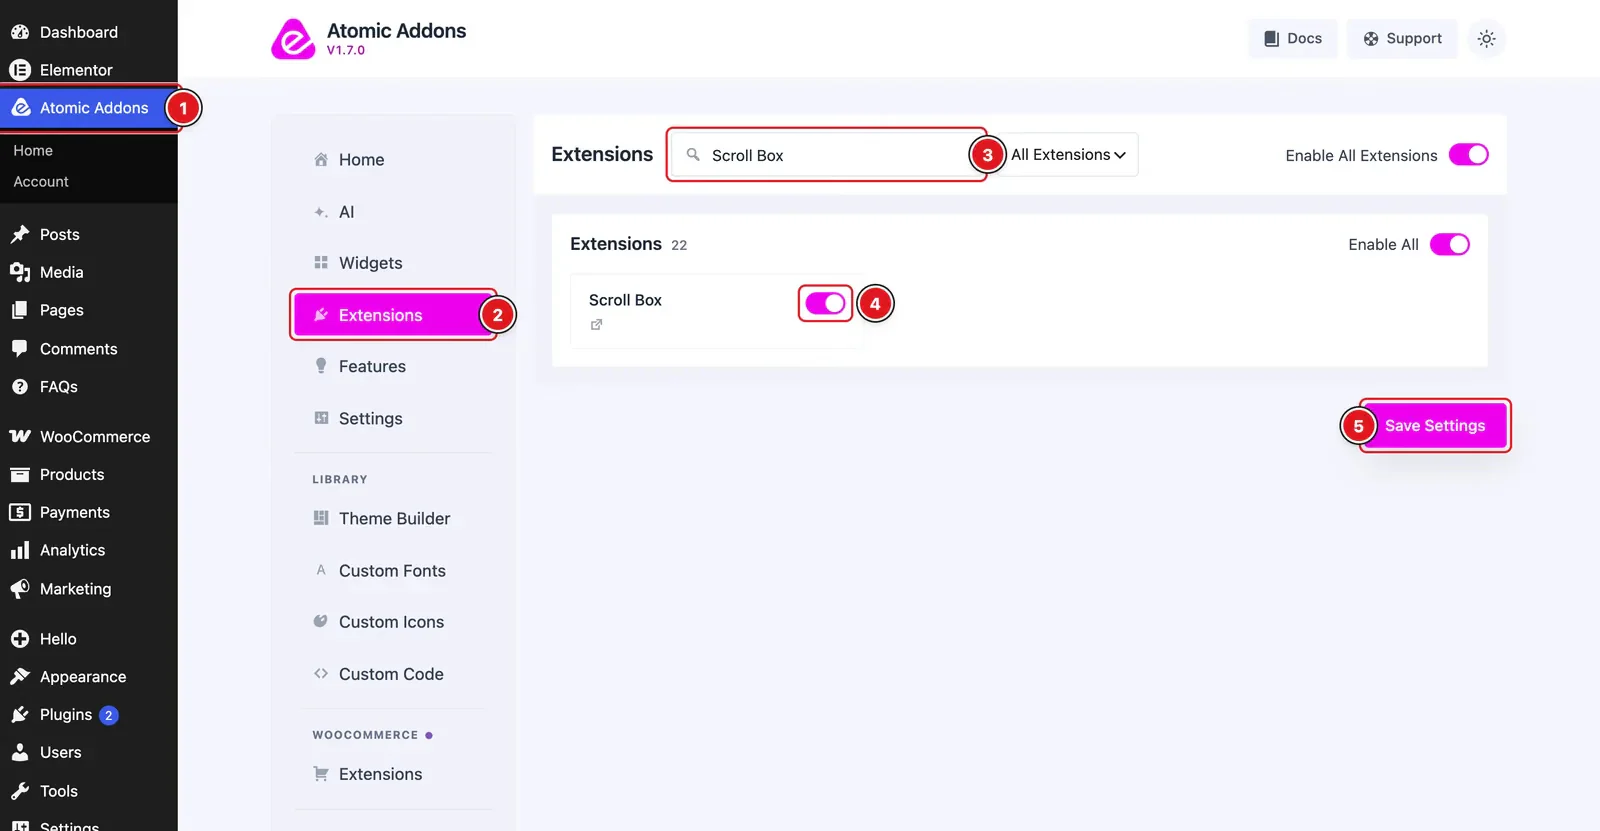
To use the Scroll Box Extension from Atomic Addons, first, you have to enable the extension.
- 1
Go to WordPress dashboard → Atomic Addons Plugin dashboard.
- 2
Then, Click the Extensions Tab.
- 3
Search for the Scroll Box Extension.
- 4
Enable the Scroll Box Extension.
- 5
Hit the Save Settings Button.
Primary Setup for Scroll Box Extension
 (Open the full-size image in a new tab)
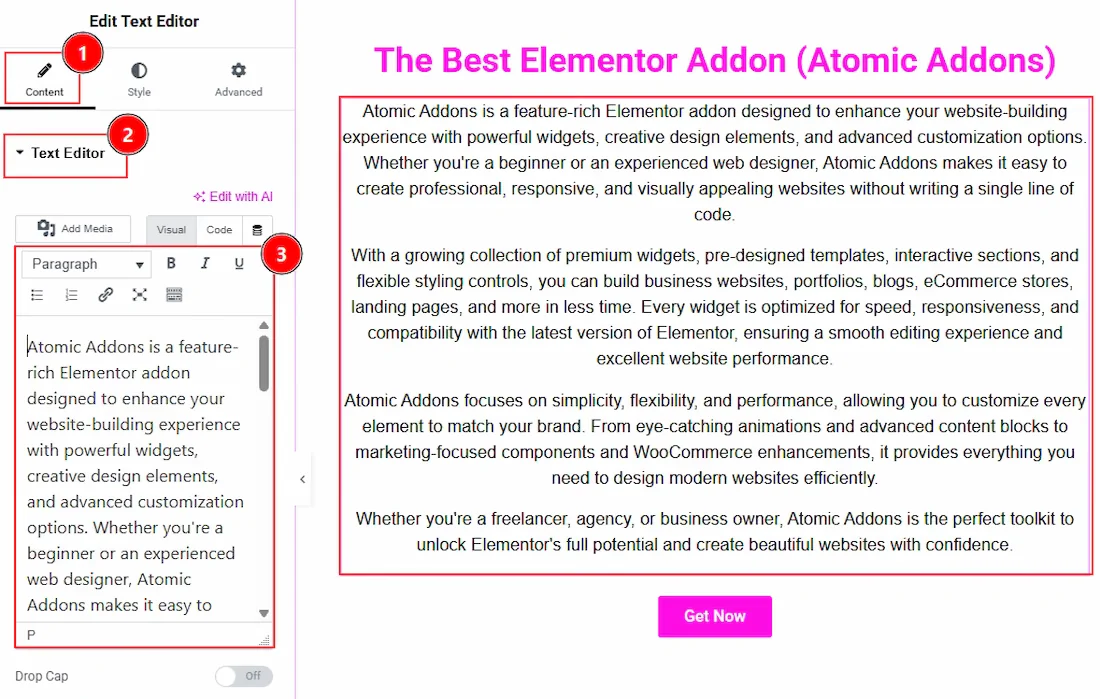
Before using the Scroll Box extension, you first need to create or select an existing design where you want to apply the extension. To show you an example we have taken below steps –
- 1
Select the Text Editor widget and navigate to the Content Tab.
- 2
Open the Text Editor Tab of Content Tab.
- 3
Add as many content you want to add to the text editor.
Place to Find the Scroll Box Extension
 (Open the full-size image in a new tab)
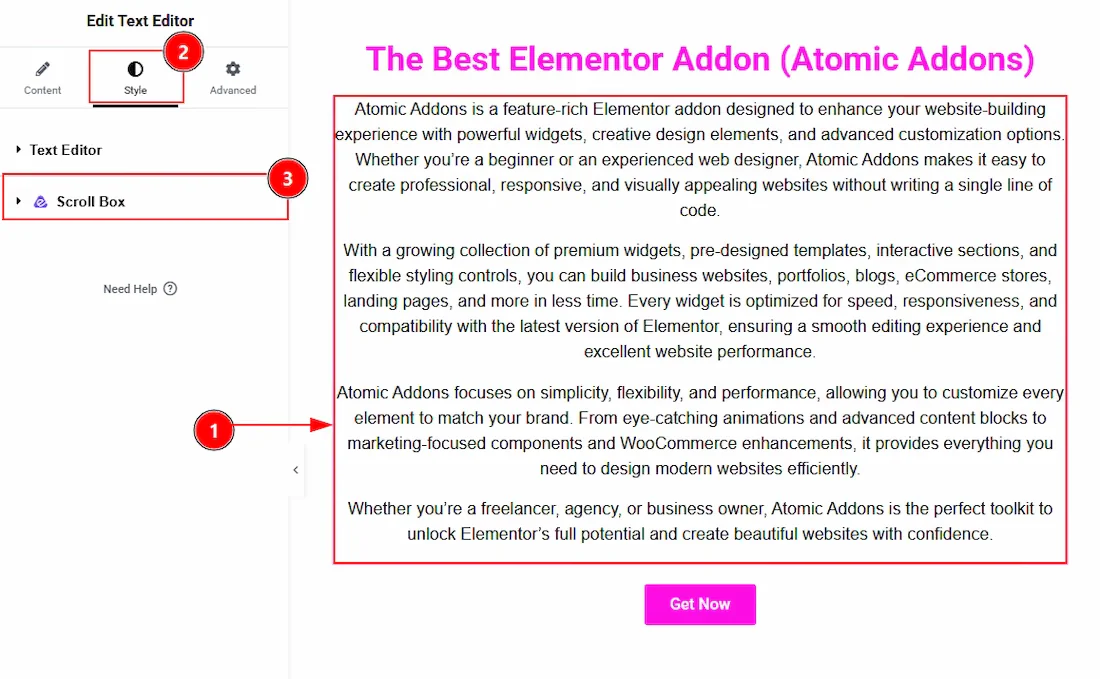
To find the Scroll Box Extension, you must need to select the element where you want to use the extension. As we have shown you the text editor widget above so let’s continue with that –
- 1
Click on the element which you want to configure by the Scroll Box.
- 2
Now move to the Style tab.
- 3
You will find the Scroll Box extension here along with the Atomic Addons logo.
Using the Scroll Box Extension
 (Open the full-size image in a new tab)
- 1
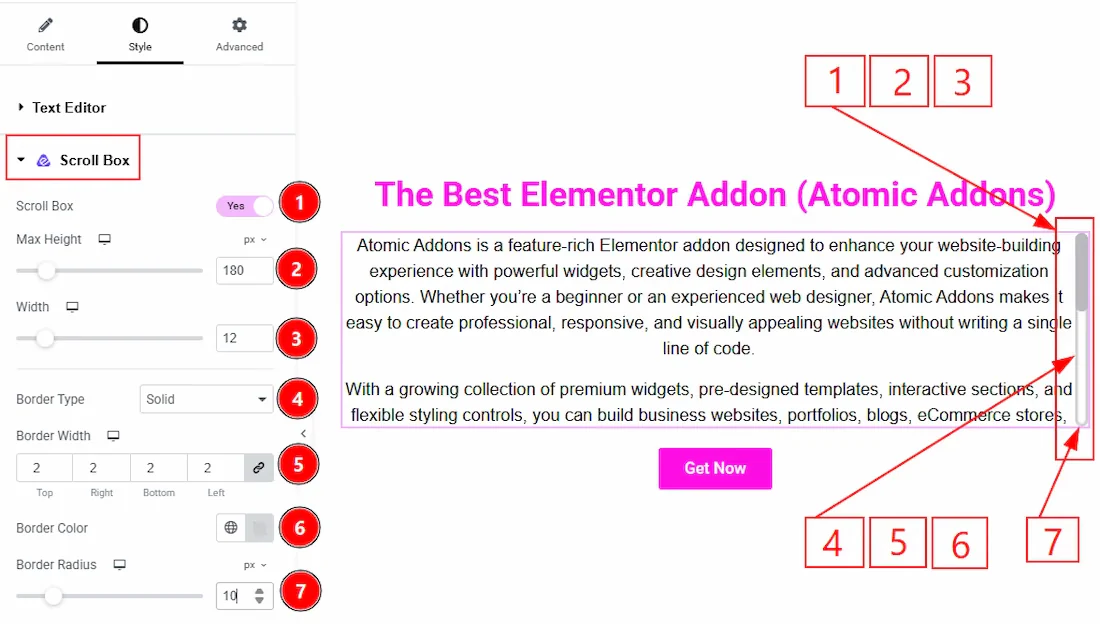
Scroll Box: Enable the switcher to get all the options to customize the scroll box extension.
- 2
Max Height: You can adjust the scroll box content field height with this option.
- 3
Width: You can set the thickness of the scroll bar with this option.
- 4
Border Type: You can add and change the border types with this option. You can choose between default, none, solid, dotted, doubled, dashed and groove.
- 5
Border Width: You can set the thickness of the border with this option.
- 6
Border Color: You can make changes to the border color with this option.
- 7
Border Radius: You can control the roundness of the border with this option.
 (Open the full-size image in a new tab)
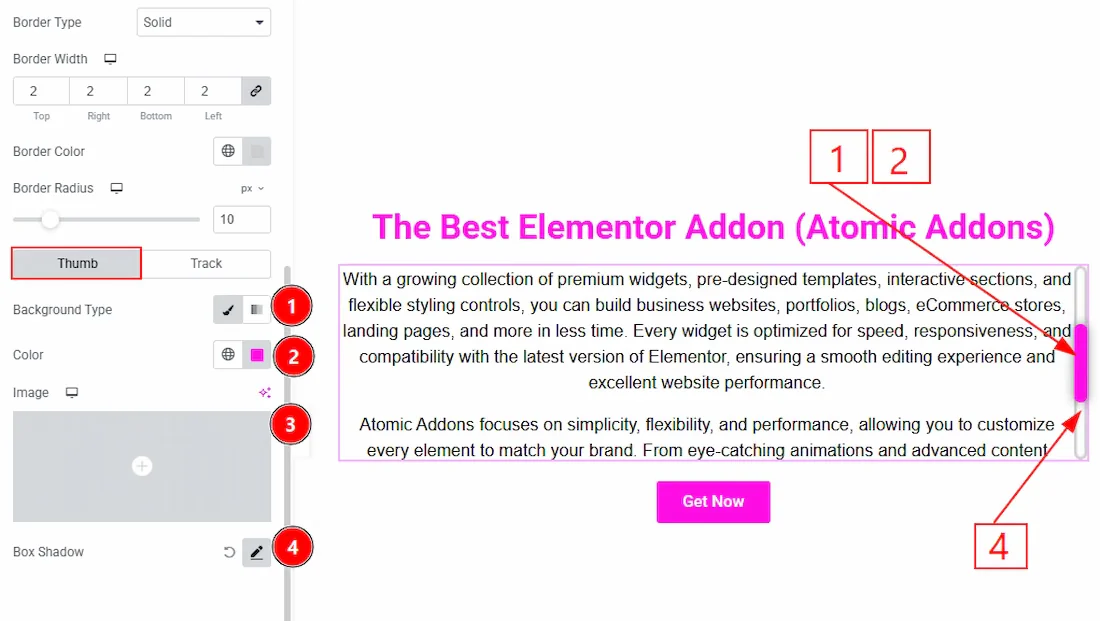
In this section. we have two more tabs. These are Thumb and Track. Let’s start with the Thumb Tab first –
- 1
Background Type: You can change the background to be classic or gradient with this option. Here we have selected the background type as Classic.
- 2
Color: You can change the background color of the thumb with this option.
- 3
Image: You can change the background image of the thumb with this option.
- 4
Box Shadow: You can add a shadow effect to the thumb with this option.
 (Open the full-size image in a new tab)
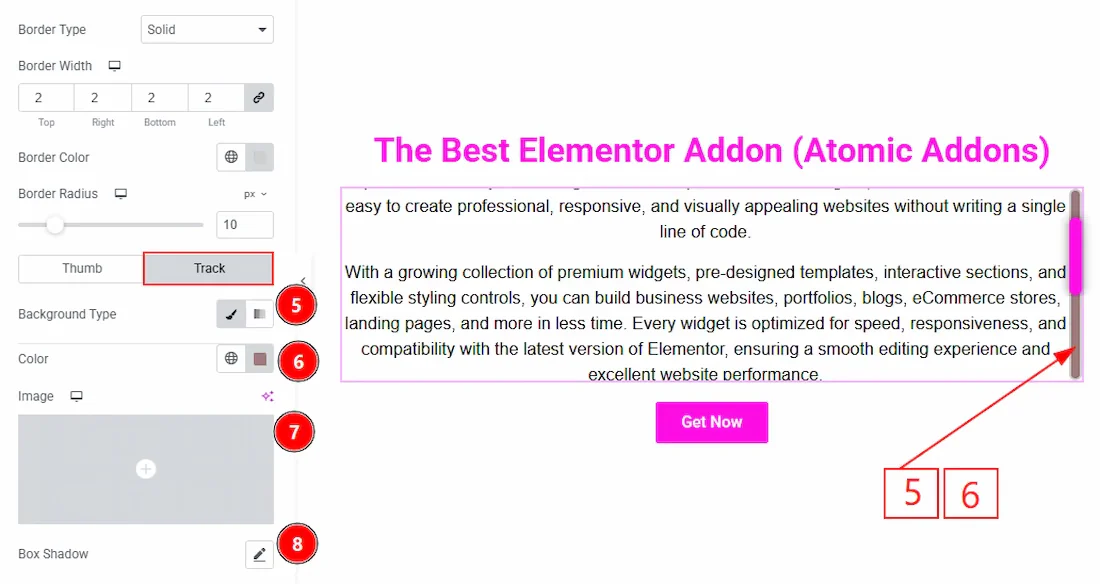
Now let’s proceed to the Track Tab –
- 5
Background Type: You can change the background of the track to be classic or gradient with this option. Here we have selected the background type as Classic.
- 6
Color: You can change the background color of the track with this option.
- 7
Image: You can change the background image of the track with this option.
- 8
Box Shadow: You can add a shadow effect to the track with this option.
All done, You have successfully customised the Scroll Box Extension on your website.
Thanks for being with us.
Can't find what you need?
Our support team can help with setup questions and anything the docs don't cover yet.